The perforation process involves driving a punch through material and the rapid failure of the material as the slug breaks free. For this reason, perforating often is mistakenly considered to be a simple two-step process.
In fact, there are six definable steps in the perforating process: impact, penetration, break, snap-through, bottom, and withdrawal. Each of these steps contains elements that are critical to the overall process. An understanding of these steps assists in selecting die construction, tool steels, and punch-to-matrix clearance.
- Impact
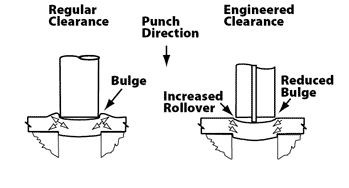
The punch first makes contact with the material upon impact. The punch comes to a stop momentarily as the backlash and flex of the ram and press are taken up. A compressive load builds rapidly, sending a shock wave up through the punch. The material begins to bulge out from under the point of the punch.
- Penetration
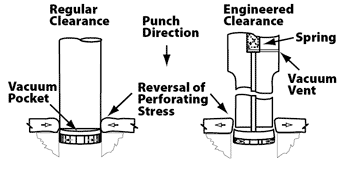
As the power of the press exceeds the yield strength of the material, the punch point begins to penetrate the part’s surface. Both the punch and matrix begin to cut from their respective sides. The leverage set up by the die clearance allows the punch to bend the slug. The center of the slug bows away from the punch, creating a vacuum pocket that will become a factor in later steps.
- Break
Once the material is deformed and stretched to its tensile limits, it begins to crack between the cutting edges of the punch and matrix. This subsequently generates the break found in the finished hole and on the outside diameter of the slug.
- Snap-through
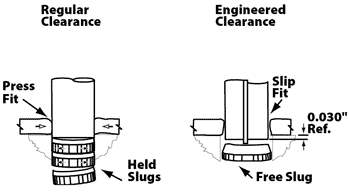
When the tensile limits of the material are exceeded, the slug separates from the part.
- Bottom
The ram of the press reaches the bottom of its stroke.
- Withdrawal
The punch is withdrawn from the part material.

